Chevak # 1
(Links are to photo's of construction)
This report covers construction of the first qayaq for the winter 1999 Qayaq project at the Cultural Heritage program at the Kashunamiut School District, Chevak Alaska.
Early in Janurary, our plane load of Alaskan Yellow Cedar arrived from down South. Although the time waiting seemed long( I had arrived in Early December), it was actually well spent, getting to know something about village life, meeting the staff and students, and having them get to know me too. In the bush, just dropping out of the sky by airplane with a pre-determined plan, and telling people what to do, doesn't work Some of my activities at this time included watching rehearsals for eskimo dancing( I got to drum once too!), helping check blackfish traps, and seeing and being seen.
Although driftwood has been used for centuries, lack of Yukon river floods, no access for me to a snow machine, and the need for a reliable source of supply, made the use of straight-grained Yellow Cedar part of our plan. Chevak School runs at over 200% capacity, and the shop classroom was long ago turned back into academic space. But we located an excellent 14" Delta Bandsaw under the gym and hauled it over to Cultural Heritage at the Blue Building, the old BIA school in Chevak. A 10" table saw under the gym was where our initial ripping and sizing of material took place- pretty exciting work in sub-zero temperatures.All buildings are up on pilings because of permafrost, so we were working in a semi-closed in full headroom crawlspace.
The first step was to lay out a pair of gunwales( Apamaq), 1 1/2 x 3/4 inches. The fwd and aft ends met at tapered 2x4 gunwale blocks, which had been cut at about a 10 degree bevel. In many traditional frames the gunwales are canted at a fairly steep angle, 25 or 30 degrees, which helps in rib installation, and the lie of the skin over the gunwales. For future qayaqs at Chevak, a steeper gunwale angle would be beneficial for these same reasons.
Before fastening the gunwales, they were cut to length, somewhat shorter than the normal rules of anthropometric sizing might indicate. We did this to fit a particular piece of cloth we had available, and also because the qayaq was intended as a "trainer" for younger school kids, say 6-8th graders, and a somewhat smaller qayaq might be more managable for them. After cutting to length, mortises for ribs were marked out, spaced about every 4 inches, taking care to miss the main deckbeam locations.
Capniaq, widened portions of the gunwales ends, are traditionally used to fasten the gunwale ends together rather than gunwale blocks. However we decided to use gunwale blocks as it was a more economical use of the straight-grained stock we were using. These blocks were fastened with glue and screws. Delta qayaqs have long used a small galvanized bolt to draw the ends of these structural memebers together, so this was not too radical a departure from normal practice of the last 40 or so years. These gunwales were held apart midships with a temporary spreader while we made up deckbeams and installed them.
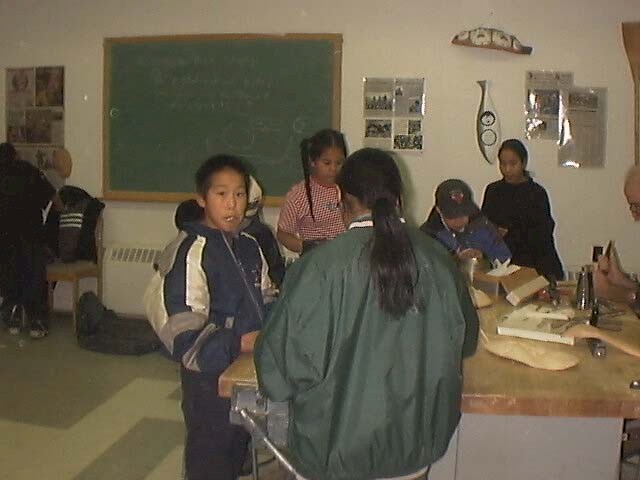
Deckbeams (ayagat) were half-lapped out of straight-grained 2x4's, cut into shape, and installed with a butt-joint and wooden pegs. The traditional system is to mortise the deckbeams into the gunwales, but the butt joint system is faster to implement and just as strong. Many older frames have broken gunwales in the way of the mortises, which seems to indicate weakening over time in the area of the joint. We made up four ayagat in all, two to carry the cockpit rim, and a pair fwd and aft of that. In addition, lighter two-piece supports called Tuntunaq will be filled in after the deckridge has been set. At this point, there were about 5 highschool students, and several adults working on the project, plus a handful of part-timers, including some middle school kids too.
The traditional width of the gunwale spacing is from the paddler's armpit to the tip of the first finger, or first finger joint ( this latter is better for longer armed persons), but in keeping with the slightly reduced dimensions of the kid's qayaq beam was set at about 27 inches.
The Amuvik or lower bow piece was glued up out of straight stock with a half-lap, although if we had been able to locate grown stock of the right curve it would have simplified matters. A 2x6 for the horizontal element, and a 2x4 for the vertical element worked fairly well, with diagonally sliced 2x "cheeks" added to the horizontal portion for extra width. The top of the amuvik is notched out for about 5-6 inches so that the gunwales sit flush in it. We used a combination of pegs and screws for fasteneing.
The stern assembly is usually two pieces, the kagaluq or lower piece is "L" shaped with the horizontal member joining with the keel or kuya. The vertical portion is about a fist and extended thumb high. The upper stern or Pamyuq (tail) is the familiar stern handhold that characterises these qayaqs.
For our qayaq, we made the entire stern post out of two straight-grained sections that were half-lapped in a "tee" formation.It is not traditional, but works well if you can't get the requisite grown stock. A small knee at the bottom of the stern post is used to beef-up the keel connection, and seems to fufill its function well. The keel laps over the bottom of the post and the knee and is lashed and pegged by way of fastening.
The after gunwale ends are carved round,leaving a shoulder, and a corresponding hole is drilled in the pamyuq, about where the kagaluq and pamyuq would normally join. Anthropometrically this is about a fist with an extended thumb up from the keel. This "peg" is how the stern assembly attaches to the gunwales, with the aid of a single lashing between the Pamyuq and the gunwales (apamaq).
At this point we were ready to install ribs (cayarat) of which the midships rib is most important, setting the depth and shape for the remaining ribs to follow. Again, I elected to make the qayaq slightly less deep than a traditional hunting qayaq might be. This overall reduction in dimensions was noticed by all the elders who stopped by, and virtually all the adults (men and women) who came by to check up on our progress, because the traditional shape and size is something pretty well ingrained in Eskimo conciousness.
In rib bending, you need to establish a width of bottom, whch can be influenced by how fast a qayaq you want, and how stable. The flat area of the bottom (before the ribs bend, or take a turn towards the gunwales can be anywhere from about two fists to two fists,plus thumbs outstretched. The wider bottom will be more stable but slower, and visa versa. Beyond the area of the flat, the rib material is carved or thinned out for about a handspan, and this is the actual area the bend occurs in. The bottom and side portions of the rib remain virtually straight and unbent, but due to the curved portion the sides run at about 45 degrees to the angle of the bottom.
It took some experimentation with shape and grain orientation before we were able to get well-shaped ribs that took the correct shape. Following the pattern of an existing framework we had for reference, and using traditional technique were important keys to our eventual sucess. One of the seemingly curious facets of Cup'ik (and Yup'ik) rib bending is that the rib material is heated and then clamped between the teeth while incremental bends are worked in. John Pingayak and James Ayuluk (who head up Cultural Heritage and were working on the qayaq with me) were convinced that this biting was the key- and they were right,. I had to overcome a certain reluctance (fear of dental damage, and maybe just being a whiteguy) before I saw the light. But the fact is that this traditional method is by far the best, our sucess rate climbed and the number of broken ribs dropped the moment we adopted it.
In accordance with traditional practice we laid out all ribs by eye before adding any stringers. This is not as hard as it sounds, but still was a bit of a challenge, since none of us were "experts" about the required shapes, and how they transitioned from one to another as we neared the ends.
It took about a day and a half to lay out our stringers (caganret) (four per side instead of the usual 5) and lash them in place. We used a flat lacing tape,a dacron and nylon mix, very strong and ultra flat profile. We used the traditional side to side lashing pattern in which the ribs and stringers are essentially half-hitched together. The lacing runs from alternate sides, so that any movement to loosen one set, will tighten another, and visa versa. Although this system looks pretty minimal to an untrained eye, it is extremely effective, and as an added bonus, is much faster than installing individual lashings at each rib/stringer crossing.
The next step was to add the Ukinqucuk the characteristic upper bow piece with a large circular opening for a hand hold. The Ukinqucuk is notched over the stem of the Amuvik (lower bow) and is held in place by a single lashing and a tenon mortised into the amuvik. Again, to an untrained eye it appears quite marginal, but is quite strong and effective in actuality. Flaunting tradition, I elected to use a piece of 3/8ths inch Bruynzeel mahogony plywood for this member, one of the FEW instances where plywood can be effectively used in skin boat construction. In many older frames, the upper part of the handhold is broken; the extra strength and good grain structure of the plywood should work to advantage here.
Next we added the deck ridges (qularaq) , and the tuntunaq. All that then remains is to bend the coaming (pai) and add it's supports (ayapervik), and the frame is ready to be skinned.
On Feb. 17 the frame was completed in all details, and covering started.
And then, we were done.